On this page
Seven steps from a blank campaign to one that runs on a schedule, using a golf app as the running example.
Posting to TikTok every day is a grind. Building a slideshow campaign once and letting it run on a schedule is not. That is the idea behind Volume: you define the rules for what a post should look like, connect your account, and the platform generates and publishes new slideshows for you at the times you choose.
Here is how to build one from scratch, using a golf app as the running example.
01Understand the three-part anatomy
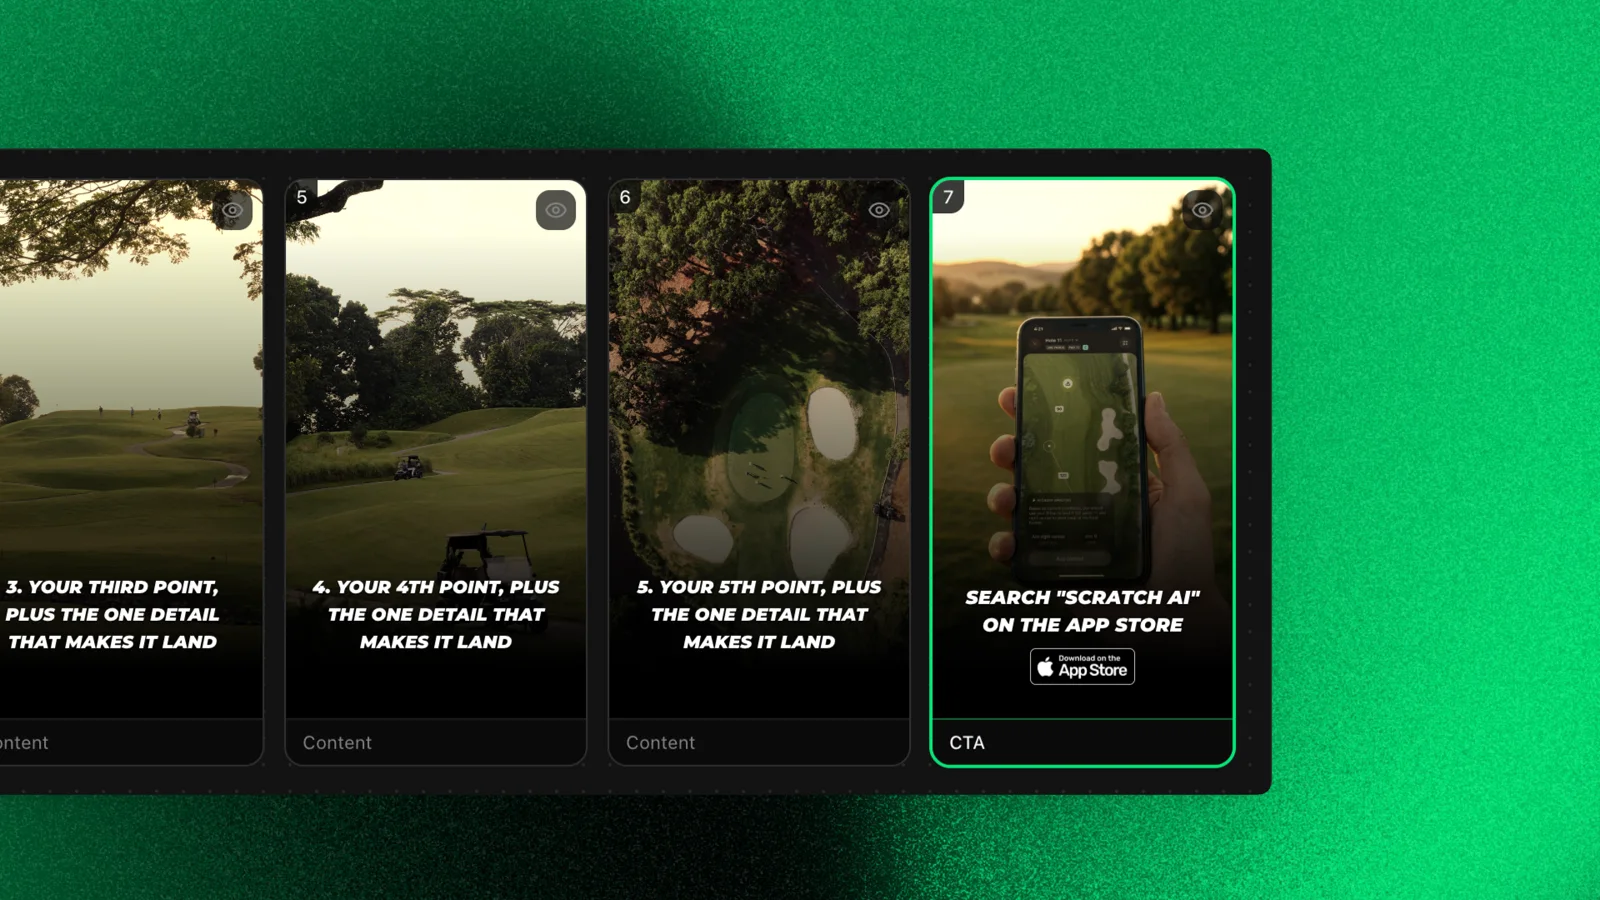
Every slideshow has the same skeleton: a hook screen, content slides, and a call to action.
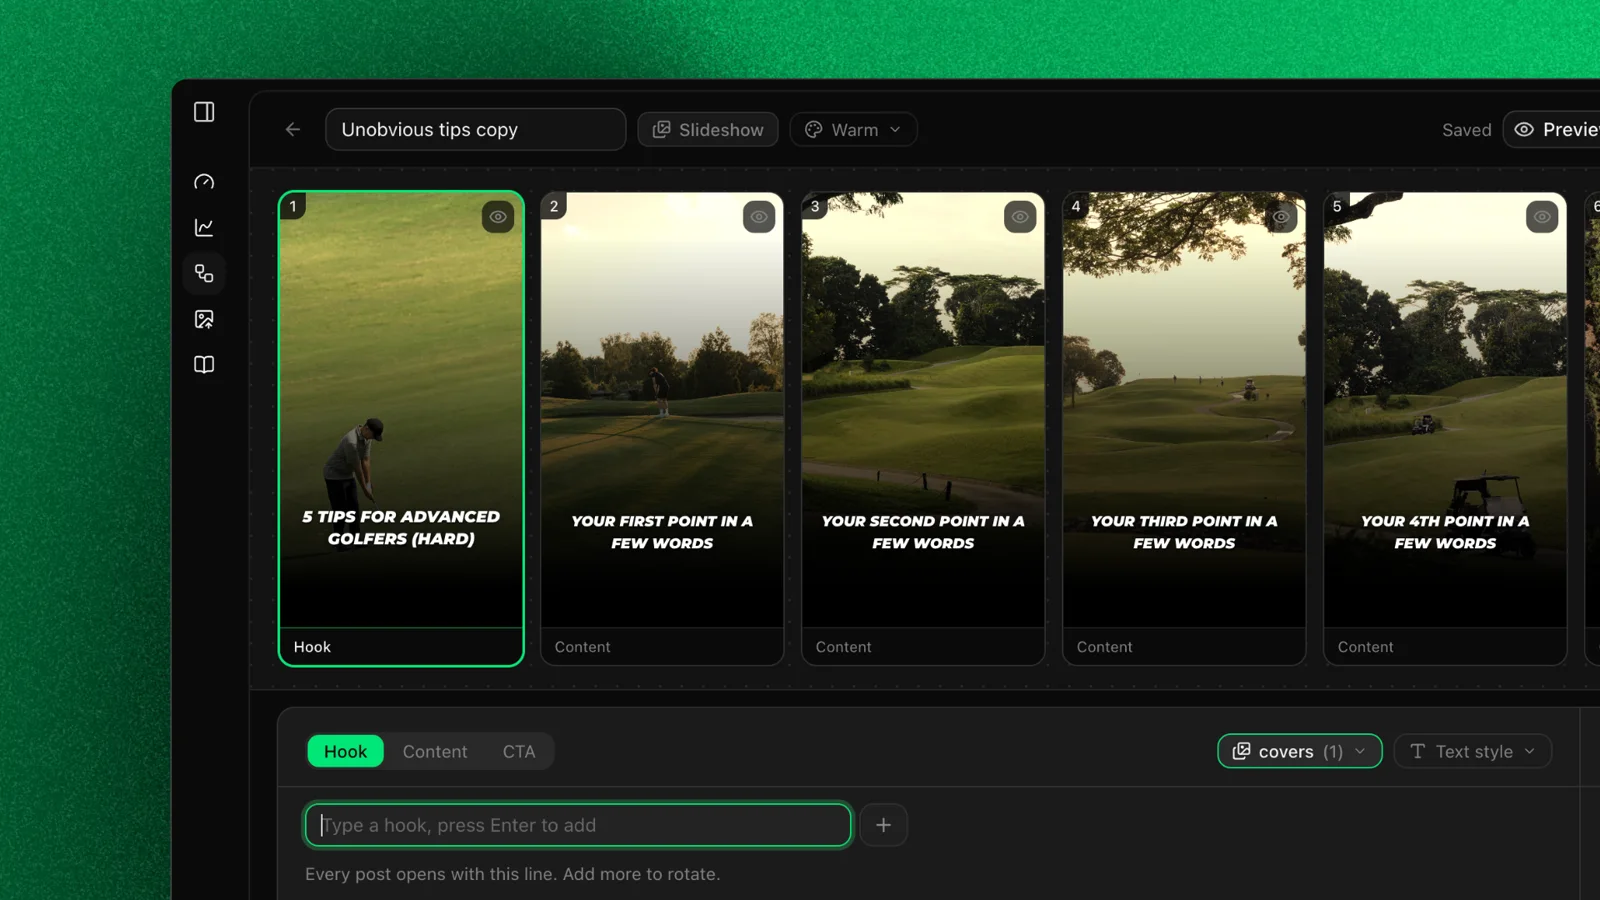
The hook screen is the first thing anyone sees on their For You page. The content slides deliver on whatever the hook promised. The CTA slide puts your product in front of someone who just got value from you for free.
For a golf app, that looks like a hook reading “6 unconventional ways to get better at golf”, five slides covering those ways, and a final slide featuring the app. Get the structure right and everything after this is filling in blanks.
02Write and test multiple hooks
This step is the whole ballgame. If the hook screen does not stop the scroll, nobody swipes, and the rest of your slideshow may as well not exist.
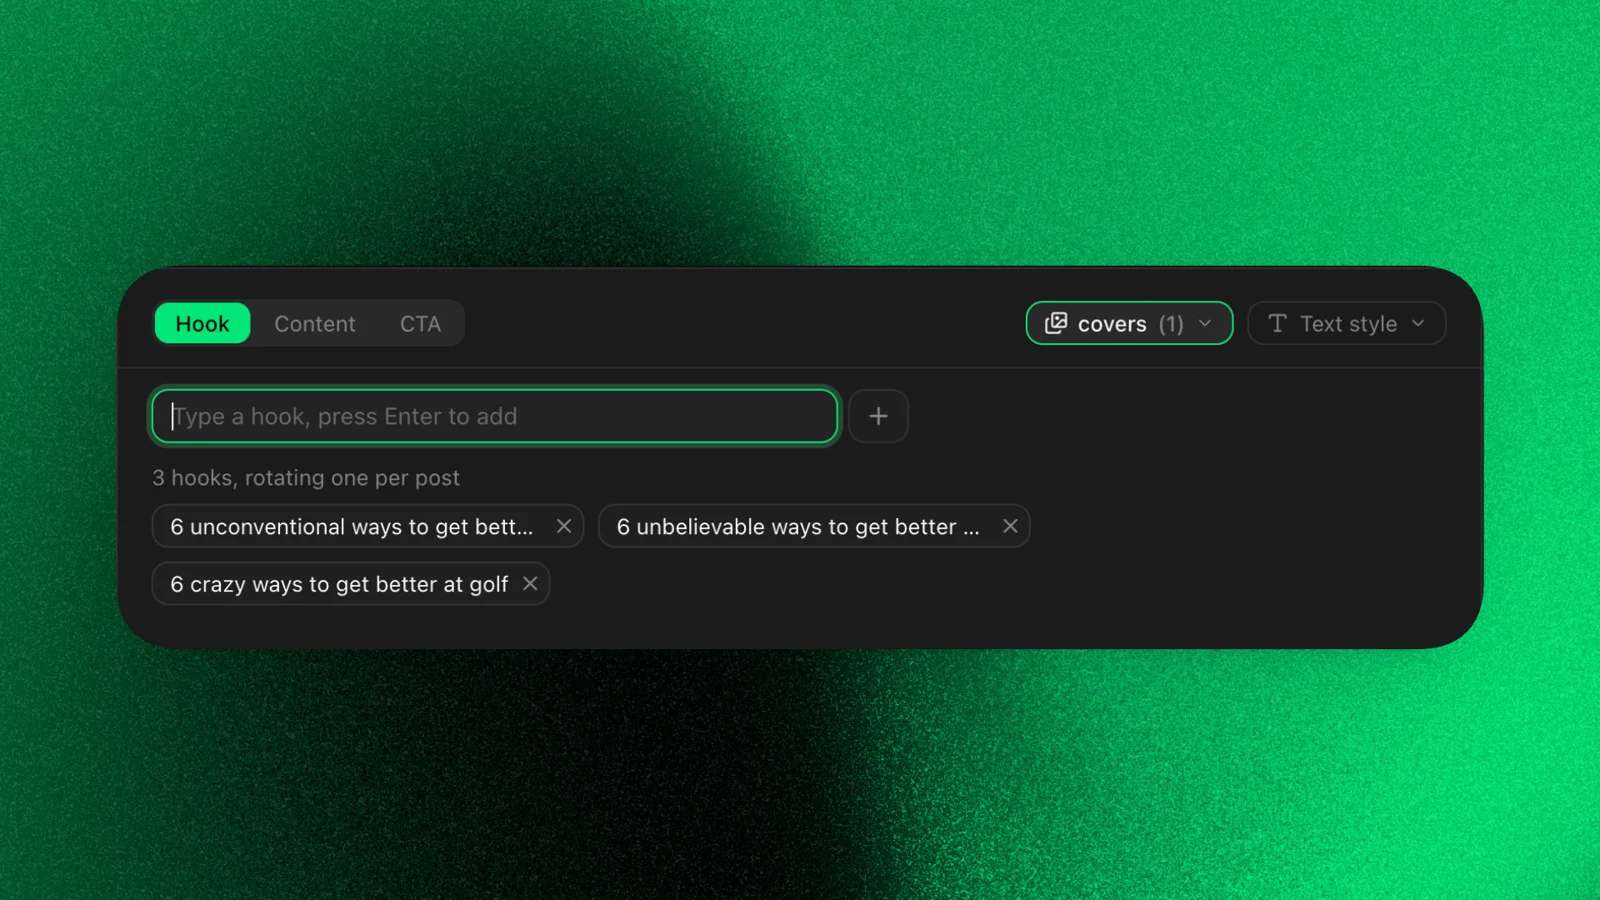
A strong hook is specific, numbered, and promises something the viewer has not already heard a hundred times. “6 unconventional ways to get better at golf” works on all three counts.
Then do not stop at one. Enter several hook variations into the campaign. Every time it runs, it picks one of them at random, so over a few weeks you get real data on which angles land and which ones die.
03Build your image libraries
Instead of attaching one image, you attach a library, and the campaign rotates through it automatically. Each run pulls a fresh image, so your slideshow never looks identical twice even though the rules never change.
You will want three separate libraries:
- Hook screen images. Search a term like “golf course” and select around four. Choose images with plenty of open space, since your hook text sits on top and a busy photo makes it unreadable.
- Content slide images. Keep these distinct from the hook library. If the hook is golf courses, make the content library golfers.
- CTA images. Your app shots and screenshots of the product, for the last slide.
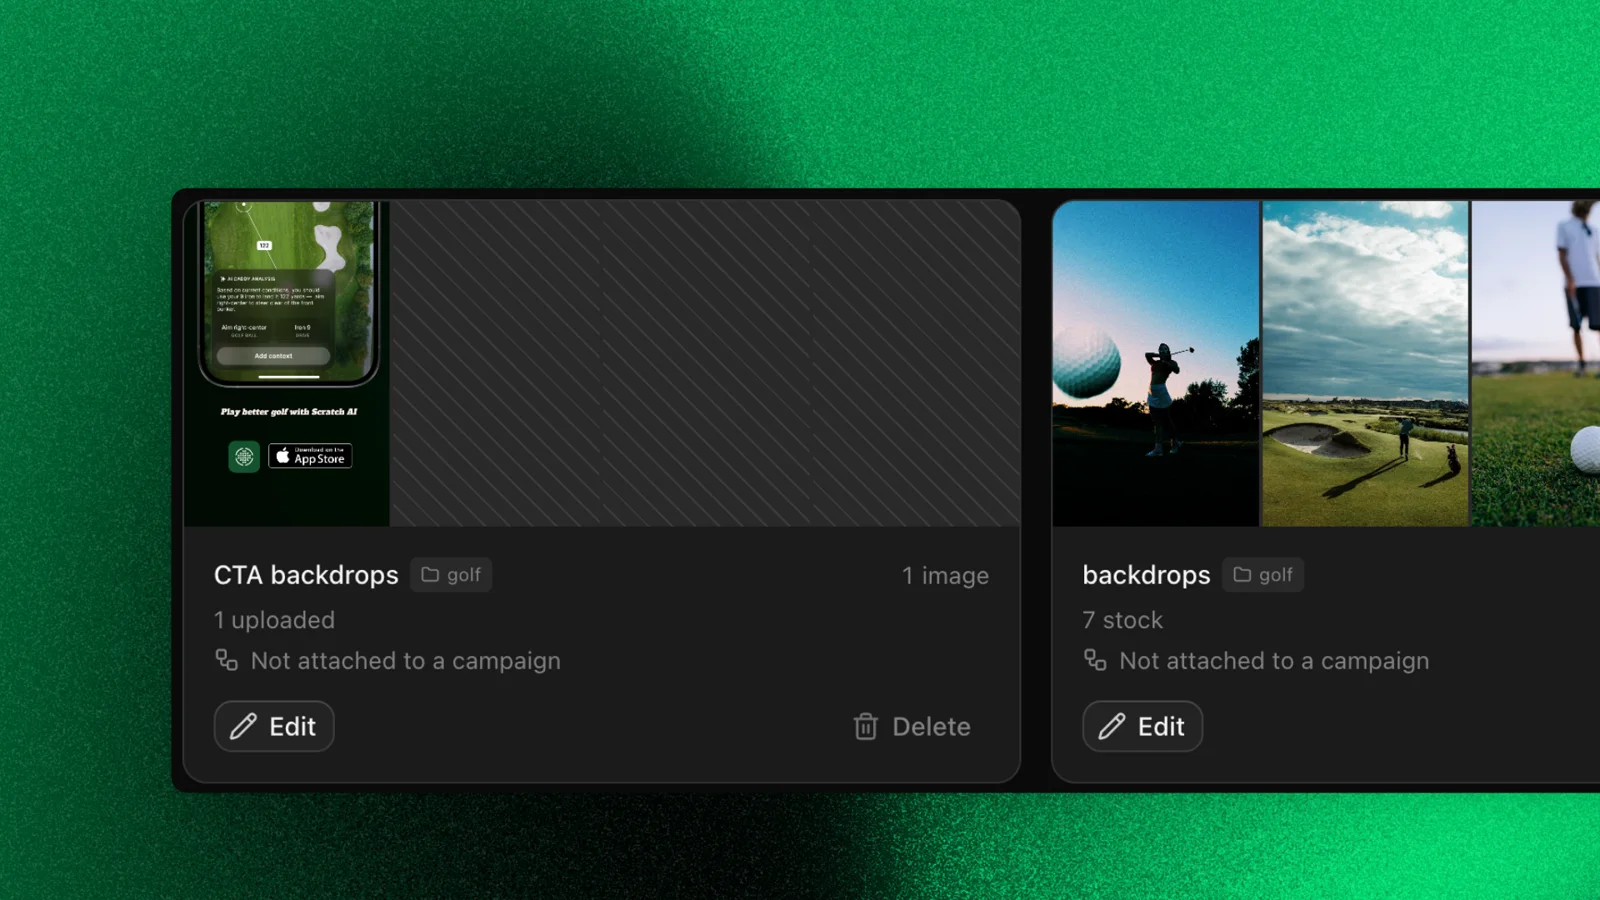
Name each library as you go so they are easy to reuse in future campaigns.
04Prompt your content text
You do not write these one by one. You describe what they should be, and the campaign generates fresh ones on every run.
Vague prompts produce vague slides, so be specific. The example prompt was tight: “the slides should be ways a golfer could improve their game, they should be unconventional rather than standard teaching, and critically they need to be accurate, data-driven, and use numbers wherever possible.” That last constraint is what separates a slideshow that feels authoritative from one that feels like filler.
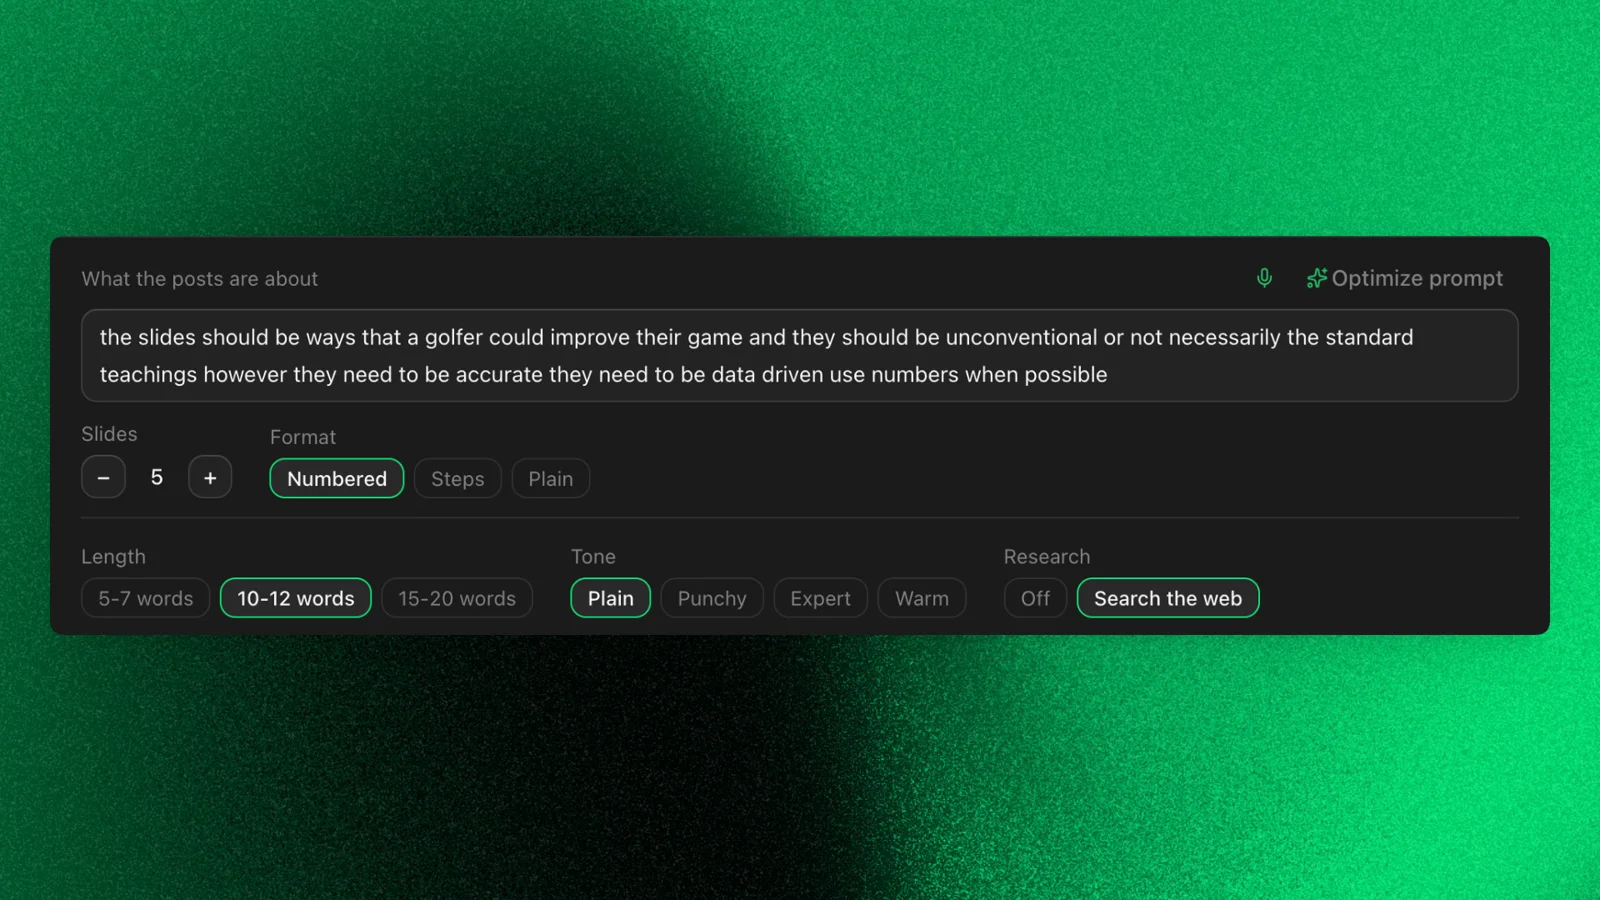
One detail people get wrong: match your slide count to your hook. The hook promised six ways, so generate five content slides and let your product be number six. You can also adjust the format, length, and tone from here if the defaults do not fit your voice.
05Build your CTA slide
This is where your product actually appears. This screen should direct people to your product. You could mention your product name or show your product working with a screenshot. If you have an app, use an app shot and the App Store badge.
06Connect your TikTok account
With the campaign built, link the account you want to post from. This is what turns a slideshow template into something that actually ships.
Worth thinking about before you connect: one campaign maps to one account and one angle. If you are running multiple niches or testing different positioning, build them as separate campaigns rather than cramming everything into one.
07Set your schedule and posting times
Open the side panel and pick your posting days and times. You can select any combination of days and add multiple posting times. Three times a day is entirely doable.
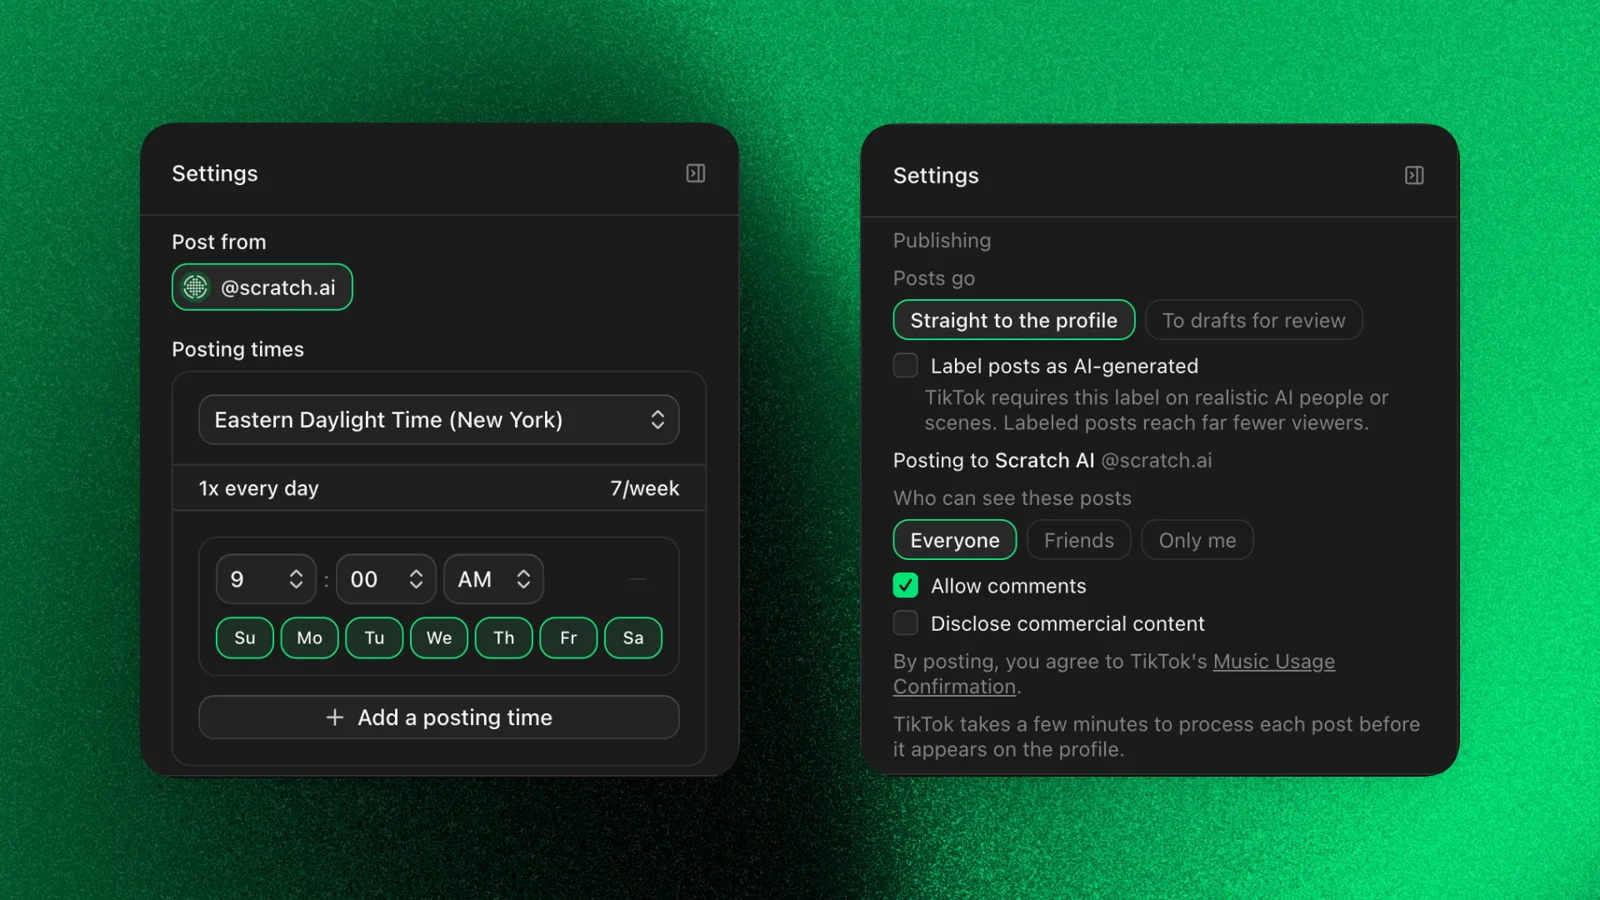
Then decide how posts go out:
- Straight to profile. The campaign publishes automatically at the times you set. Fully hands-off.
- Send to drafts for review. Posts land in your promotions tab and you publish them manually from there.
If the account is new, start with drafts to warm it up before switching to fully automatic. It is not required, but it is the safer path.
Hit Start, and the campaign runs on its own.
Where to get help
If you get stuck, there is a Discord linked in the bottom left corner of the app, plus weekly office hours where the team answers questions live. For direct support, the founders, Jake Coppen and Ryan Bartkiewicz, are reachable at @jake.coppen and @ryan.bartkiewicz on Instagram.